Minecraft gives great opportunities for creativity. From simple cubes in this sandbox, you can create real masterpieces. One of the interesting directions in Minecraft Arte is the creation of paintings. You can draw paintings in minecraft using various materials – wool, fabric, clay and, of course, multi -colored blocks. Combining them with each other, you can create amazing canvases of any complexity. In this article I will tell you how to make a picture for decorating a house or a gift to friends. Even without artistic skills, it is possible for any player. We will also consider a way to create a picture from any image on the Internet.
How to make a picture in Minecraft – Guide
To create a picture, you will need:
- Wool – 1 block;
- Sticks – 8 pieces.
First, put the wool in the central nest of the workbench. Then evenly distribute eight sticks on the rest of the slots. As a result, the wool should be in the center, and the sticks around it.
How to hang a picture
To hang a picture, start by choosing a picture from your inventory. Then sit in front of the wall on which you want to hang a picture. Click with the right button on the wall, and each time another picture will appear. It is important to note that in minecraft the paintings can only be placed on vertical surfaces.
By default, when you hang the picture, it may not occupy the entire wall. So that the picture takes the entire surface, follow the following actions:
- First place additional blocks on the wall in the place you want to cover. For example, if you need a larger picture, place more horizontally or vertical blocks;
- After the blocks are installed, set up in front of the lower left angle of the region, which you want to close the picture. Click with the right mouse button again to place the picture;
- After placing the picture in the lower left corner, it will automatically turn around and fill the whole empty space to the right upper corner. Thus, the picture will take the entire selected area.
In minecraft, the brightness of the picture may vary depending on the direction in which it is located. Here are a few key points that should be remembered:
- If you want to get a brighter picture, make sure that it is facing north or south;
- And vice versa, if you prefer darker paintings, make sure that they are turned to the west or east.
How to make a picture from any image
In Minecraft, you can make a picture of completely any picture as follows:
- The first step is to choose an image that you want to turn into a picture for minecraft. Find high -quality images on the Internet and download them to your computer. Make sure that the image format is compatible with minecraft (for example, JPEG or PNG);
- Next, you will need to use the Image Map program to convert your image to the Minecraft picture. Open the program and click on the “Open” button to find and upload a loaded image;
- Select the mode. Scale or breakdown. The Image Map program offers two operating modes: scale and separation. In the “scale” mode, the size of the entire image will be changed to fit on one Minecraft, resulting in a square image of a lower quality. This mode is suitable for small images. In Split mode, your big photo will be divided into several Minecraft cards, which you can connect on the wall as a puzzle or pixel art. Select the regime that corresponds to your preferences;
- Export and save the file as “map_0.Dat “. By selecting the desired mode, click on the “Export” button and save the resulting file under the name “Map_0.Dat “anywhere on your computer. It is recommended to change the number 0 to another value in order to avoid rewriting existing cards in your world Minecraft. For example, to ensure compatibility, use the number 100;
- Move the saved file to the corresponding Minecraft folder. Go to the folder “.Minecraft \ Saves \ Saves \ Saves \ The Name of Your Map \ Data “on your computer. Move the file “map_0.DAT “(or renamed version that you have preserved). If you do not know how to find the Appdata folder, you can find detailed instructions on the Internet depending on your operating system;
- Turn on cheats in your world minecraft and get a card. Launch minecraft and enter the desired world where you want to add your picture. Do not forget to turn on cheats in this world if you haven’t done it yet. In the chat, use the command “/Give [your nickname] filled_map 1 [card number]” to get a card. Replace “[your nickname]” with your intra -game name, and “[card number]” on the corresponding number that you used while saving the file. For example, if you called the file “map_100.DAT “, use the number 100 in the command;
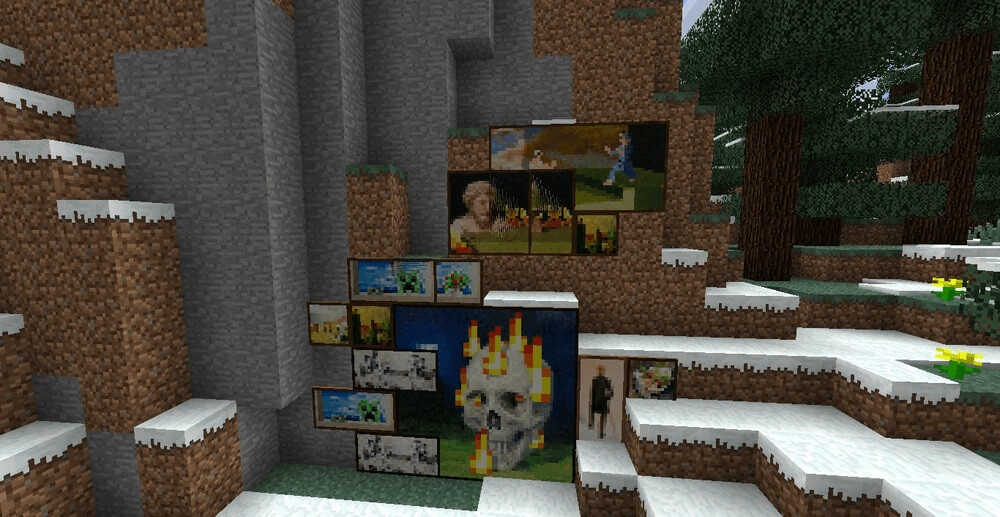
- Insert the card into the frame and hang it in the game. Holding the card in the inventory, make a frame and place it on the wall in the world Minecraft. Then click on the right mouse button on the frame with the card to hang it in place. Take a step back and admire your personalized picture in the game!
Note: the resulting picture from Minecraft may look small and less high-quality due to the restrictions of the game resolution and square format. Keep this in mind when choosing and converting images.
Results
In conclusion, I want to say that the creation of paintings in Minecraft is a fun and creative way to give your buildings individuality. Having only a few materials and a little imagination, you can reveal your inner artist and turn any image into an amazing work of pixel art. So why not try? Take wool, sticks and creative abilities and begin to draw your world minecraft today!