Safety and protection are the most important aspects of a comfortable game in Minecraft. With the advent of grifters that purposefully damage or destroy other people’s buildings, it becomes extremely important to take precautions to protect your property. One of the effective ways to achieve this is to privatize the desired territory using special tools available in the game.
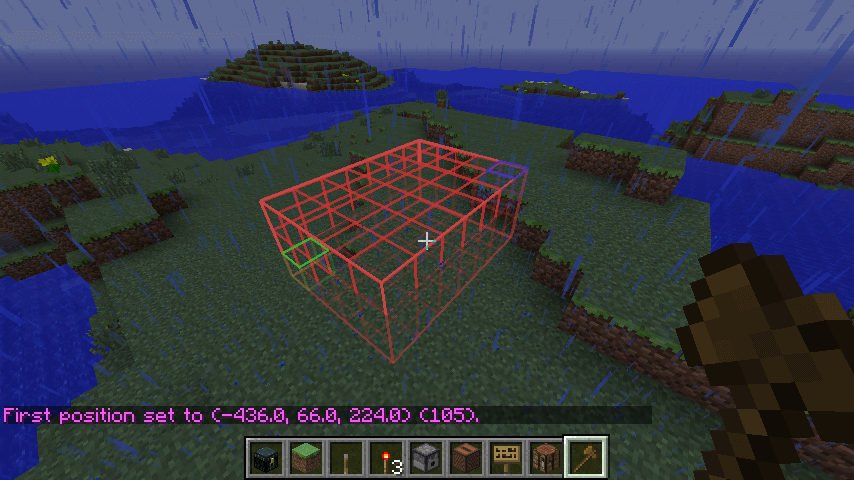
How to private in Minecraft step-by-step guide
So, let’s start privatization:
- First, create an item for allocating the territory – a wooden ax. To do this, select the “Weapon” tab in the menu, find an ax and craft it;
- Choose the first corner block of your site and knock on it with an ax, holding the left mouse button. This will be the first position;
- In the opposite corner, we also knock with an ax, but already with the right button. Fix the second point;
- Next, set up the height and depth using commands // Expand. For example, 20 vertical blocks and 10 horizontally;
- Using the command /Region Claim, we give the name to the protected area.
After all the steps are performed, the territory will be privatized, and the griffers will not be able to spoil it! There will also be a message about a successful private indicating the name of the region. Now your territory is protected from griffers, and you can enjoy the game in security.
Flags of protection
Protection flags are a function in Minecraft, which allows players to establish certain rights and rules for their private territories. These flags are controlled using special commands and implemented by the WorldGuard plugin, which is established by server administrators to enable the privatization of the territory. One example of a useful flag of protection is the PVP flag, which can be used to ban the battles of the player against the player in a particular region. This can be useful for creating peaceful zones, where players can interact without the risk of battles. To set the “PVP” flag for the region, execute the /RG Flag command <The name of the region> PVP Deny. This command should be executed in a chat or a console interface, replacing “<The name of the region>” On the name or ID of the region to which you want to apply the flag. It is important to note that the availability and functionality of the protection flags may depend on the server on which you play. Some servers may have additional or user flags, while others may not use protection flags at all.
Other privatization commands
- // POS1 – used to install the first point when allocating the territory for privatization. Helps to determine the boundaries of the region you want to privatize;
- // POS2 – after using the POS1 command, you can use the POS2 command to install the second privatization point;
- // Shift <n> [U / D / N / S / W / E] – allows you to shift the selected privatization grid to a certain number of blocks in the indicated direction. Provides flexibility when setting up the position of a privatized region.
These auxiliary commands of privatization provide additional opportunities and options for privatization of the region.
How to add to a friend’s private
To fully enjoy a joint game and cooperation with friends in a particular region, you need to add them to private. This will give them the same privileges as you and will allow you to participate in various actions, such as the construction or mining of resources. To add a friend, just execute the /rg amber command name_pind Nick_druga. After activating this team, you will receive a message confirming the successful addition of your friend to the region. This step provides unhindered cooperation and increases the overall game experience in the private region.


