Minecraft is one of the most popular computer games in the world. Millions of players are immersed daily into its cubic world, build incredible structures and fight monsters. But over time, simple Minecraft graphics can be a little tired. Fortunately, there is a simple way to significantly improve the visual component of the game is to install shaders.
They allow you to change lighting, add realistic shadows, beautiful reflections in water and much more. They significantly transform the usual Cubic-Mir Minecraft, adding depths and realism to it. The installation and configuration of shader takes just a couple of minutes, but completely changes the visual perception of the game. Let’s figure out how to turn on the shaders in Minecraft and enjoy the updated picture of this legendary game!
More about Shaders
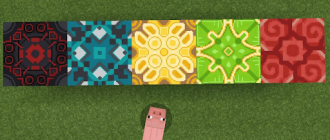
Shaders are small programs that perform additional graphic calculations to improve the image. They allow you to convert the usual three-dimensional Minecraft graphics into something truly bewitching.
Before installing shaders, make sure you have a fairly powerful computer. Shaders require significant system resources for comfortable work. You will also need to install the Optifine mod that optimizes Minecraft for working with shadeers.
Search and installation of shaders:
- Go to popular sites for Minecraft, such as Curseforge. There you will find dozens of different options;
- Download the chider you like in the form .ZIP archive. Put the contents into the Shaderpacks folder (Shaderpacks).
Popular types of shaders:
- Sildurs – realistic dynamic lighting and shadow. Great choice for beginners;
- SEUS – beautiful volumetric clouds, shadows, lighting, reflections in water. One of the most popular;
- BSL – spectacular atmospheric effects, incredible sunsets and sunrises. Ideal for screenshots.
We turn on the shaders in Minecraft
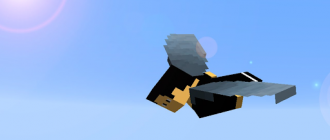
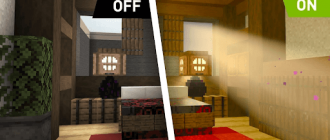
Shaders can significantly improve Minecraft, adding realistic shadows, beautiful reflections, dynamic lighting and much more. Installing shaders is quite simple, the main thing is to enable their support in the settings.
Step-by-step guide:
- Inclusion of support for shaders. To enable the shaders in Minecraft, you need to put a box in the launcher settings opposite the “Support Support” item;
- Optifine installation. For comfortable work of shaders, an Optifine mod will also be needed. It optimizes the graphic part of the game and allows you to configure shaders. Download the Optifine archive for your version of Minecraft and install the mod as a regular Forge mod-place the Jar file in the Mods folder;
- Installation of shaders. Now you can choose the one you like and the shader-pack. They can be downloaded on sites like curseforge. Unfusion of the shader archive in the Shaderpacks folder (C: \ Users \ User \ Appdata \ Roaming.Minecraft \ shaderpacks);
- The inclusion of shaders in the game. Launch Minecraft, go to video settings (Options > Video settings) and at the very bottom you will see the shader section. Select the shader you like from the list and click the “Apply” button.
If the shader is too heavy, you can reduce the intensity of some effects.
We draw conclusions
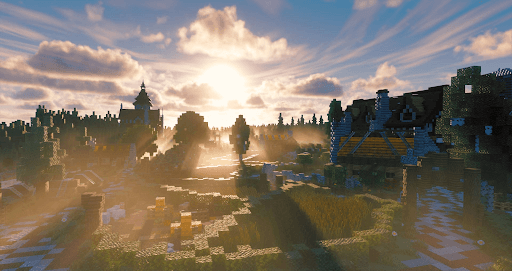
Having installed the shaders, you can fully appreciate the beauty of the world Minecraft. Realistic shadows, soft dynamic lighting, beautiful reflections in water, voluminous clouds and fog will add incredible charm to this pixel world.
However, do not forget that powerful shaders require powerful iron. If you have an old or weak computer, hanging and low FPS with shadeers are possible. In this case, experiment with different shaders and their settings to find the best option for your system. In addition, some shaders can conflict with certain mods. Therefore, create backup copies of your worlds before installing new shaaders. And if you notice strange behavior – immediately turn off the shaders.
In general, shaders are an amazing opportunity to make Minecraft a familiar picture of an even more picturesque and realistic picture. Experiment with different shaders and their numerous settings to find your ideal version of the visual design of the game. Pleasant travels to Minecraft’s transformed world!